|
Final Fantasy XIV's yearly The Rising event commemorates both the events in the game world's deep lore and the players who make the game possible. This year, it is accompanied by a particular event quest that gives you access to the Cheap Dungeon, a retro-inspired throwback to dungeon crawlers of old. We're here to tell you how do you get to it, what to do once you're there, and what the point is!
How to Get There The first thing you'll need to do is head to Ul'dah and the Stairs of Nald. Pick up the "A Reoccurring Bug" quest—a level 15 quest—and make your way to Western Thanalan to search for the Wandering Minstrel at Nophica's Wells. You'll go through some dialogue once you find him, where the minstrel explains the trouble caused by some magic bugs, before gaining access to the dungeon itself. Once inside, you'll soon realize the pun-ny significance of the quest's name. The Cheap Dungeon is a throwback to old-school dungeon crawlers, where you navigate a labyrinthine series of corridors in first person. As you do so, you'll be treated to an 8-bit soundtrack playing and—depending on your background—some nostalgia-inspiring retro graphics. Your goal here is to unscramble a series of letters to find the right password to complete the dungeon and get rid of the "bug." If you want to get some Gil, you can visit our website MMOPixel to buy FFXIV Gil. We will provide you with the best service and lowest price on the web. What to Do To do that, you will need to explore each nook and cranny of both floors. There are some quirky little game developer jokes to be found on some of the walls, but what you're really looking for are numbers and letters. The numbers on the first floor correspond with the order of letters on the second floor, and you unscramble the letters based on that to get the password. You get a map that fills itself in as you explore and will record the location of the numbers and letters, but it wouldn't hurt to have a pencil and paper handy to jot them down and save yourself from going back and forth to check the map. Spoilers Ahead! The password is randomly picked from a pool of possibilities, including Bahamut, Chocobo, Crystal, and Fantasy. After entering the password, you'll head back out of the Cheap Dungeon and speak with the minstrel again, before being treated to a nifty little cut scene; after going back to Ul'dah and finishing the quest, along with seeing an additional scene, you'll receive your reward: a Stormblood Orchestration Roll, a Wind-up Lyse, and a Wind-up Gosetsu. You also get unlimited access to the Cheap Dungeon and can get back to it by visiting an inn, if you wish. That wraps up this guide to the Cheap Dungeon! The quest is available until September 14th at 7:59 PDT. Let us know if you plan on completing it! Source:https://www.mmopixel.com/news/ffxiv-guide-the-rising-password-for-cheap-dungeon.html
0 Comments
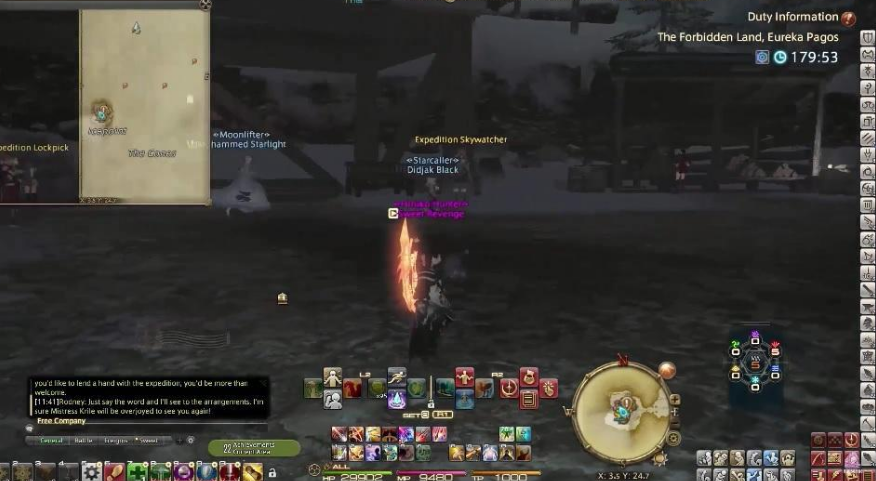 Despite not being the game's newest material, Eureka is quite current. In actuality, Eureka still shines as a farming region and a great lot of fun thanks to glamor goods, relic swords, armors, and a large quantity of Gils. You can access Eureka's Forbidden Land after finishing the 60-quest challenge. This place can accommodate around 144 gamers at once. There are primarily four zones in Eureka:
When you initially enter the instance, you will still have to weave through groups of enemies that could easily one-shot you, but now you also have sleeping dragons that will hunt you if you wake them up. Pagos is Eureka's second zone and is substantially harder than Anemos. You may farm the infamous "Bunny FATEs" that appear in Pagos and reward players with treasure chests, with a gold chest delivering 100k Gils all at once. These FATEs spawn fairly frequently. Some crucial tips for being in EurekaWhen in Eureka, remember to follow this straightforward advice:
Quest level and location:
With Endwalker, many changes are anticipated for both the classes and the built-in features. In addition, with the expansion, the new "Pandemonium" eight-player raid tier is also unveiled. Final Fantasy XIV Eureka Pagos - WeaponsOnce you reach the required level, 25, you can unlock the weapons. Similar to animoes, the player's objective in pagos is to procure 500 pagos crystals from the infamous monster FATE. Gerolt will appoint the players with a Eurekan kettle and can gather aether from the vanquished opponents after reaching level 25. When you reach the top level in the jar, almost all adversaries provide a sizable amount of light that may be used to obtain aethers. Depending on the experience, different amounts of aether are gathered. Aether may be increased to its full potential by using elemental boosts and potions of harmony. Nine lights are the most that can be used in a kettle. You may transform this light into frosted protean crystals, creating room for more light. After visiting the Crystal Forge, you may transform the obtained aether into frosted protean crystals by placing the light into the eureka kettle. Chain farming is all that is necessary to obtain light. FarmingIt's easy to find light to harvest in FFXIV because there are many different ways to cultivate it. You have to ride the fate train to get light. Although the procedure could take a little while, it is less dangerous and simpler for new gamers. Fighting frozen void dragons is another method for obtaining light. It will provide a good deal of illumination, but use this strategy only if you have enough upgraded weapons to cover all your bases. If not, try another route. Chains of farming 500 Pagos Crystals 365, Elemental Eureka Pagos Pagos 5 Frosted Protean Crystals 360, Pagos +110 Frosted Protean Crystals 5 Louhi's Ice 370 and 16 Frosted Protean Crystals. Before devoting your time and effort to side activities like light farming, etc., level up your game. At higher levels, these activities will gradually become easier to accomplish. Levelling up requires you to obtain different equipment from the store in exchange for Gils, the in-game currency. But there might be situation that you fall short of the Gils, in such case you can purchase them from our website for real money. If you want to get some Gil, you can visit our website MMOPixel to buy FFXIV Gil. We will provide you with the best service and lowest price on the web. Hidden rewards and treasures in Eureka Pagos Bunnies will be scurrying away from destinies in pagos to save their life. You can protect them from this danger if you choose to. After that, they'll repay you by getting you well. Additionally, if you succeed in saving these bunnies, you'll see that they start to follow you. They can lead you to buried treasures as well. Mounts and minions in these lost riches can be of varied assistance to you. 31 Frosted Protean Crystals are required. Some of Louhi's crystals, which are obtained as a reward for winning the battle against Louhi, are required by Gerolt. If you're unsure about who or what Louhi is. I'll tell you right now that it is the last monster in the Pagos zone and is terrifying enough to frighten anyone. You may also purchase it by offering the bird watcher 50 pagos crystals. Gerolt can provide further information about weapon updates and how to use them. You can finally access the new realm of Eureka if you have completed all 70 levels of missions. In addition, you'll receive an outdated weapon if you've completed the necessary number of objectives. New Updates in the Eureka PagosYou may now effortlessly travel over many areas thanks to the mount rides introduced in Patch 5.1. However, you must be aware of your surroundings as you explore the new regions of Eureka. Try to stay away from any frozen void dragons or sleeping dragons if you come into touch with them. They may impact your player's health, which might lead to death. Don't startle them awake by sprinting. Change your mode from sprinting to walking instead. You may effectively avoid them in this manner. However, your meeting with these animals may be ruined if you fall down a cliff since they could become awakened by the noise and disruption. As your health continues to decline after falling, you must battle them with everything you have left to avoid being murdered by them. It is advised to review a map before entering the pagos. You must navigate several cliffs and obstacles to travel the full zone. This will enable you to prepare for the difficulties while avoiding any evident failure quickly. Additionally, you can defend yourself from the freezing vacuum and sleeping dragons by landing far from their position. Source: https://www.mmopixel.com/news/final-fantasy-xiv-eureka-pagos-guide.html With some changes in the game itself, leveling in the realm of Final Fantasy XI isn’t that much headache now. You can gain massive EXP in a short time, but the problem here is finding a good route in-game. Don’t worry because here we have FFXI Leveling Guide 2022 to help you with leveling. So, without any further ado, let’s hop into the details.
Getting Started with GuideSo, for this guide, you will have to first get the Trust Request (activate), and bring along some of the EXP boosting accessories in a game-like Destrier Beret and so on. Lastly, it is not essential but you should bring Records of Eminence where it is required. You might ask, what is the reason for bringing Records of Eminence if it is not essential? Well, it can make things easier for you, especially your journey and it is also exceptionally effortless to unlock. EXP gains are mostly from the objectives that are available for a limited time, you need to keep an eye out for them as well. In a certain area, some limited-time quests will get along very well like the Vanquish Undead and so on. As everything is clear now, let us move into the guide itself. Leveling Guide As a guide, we will go through the beginner level to the pro level, guiding you along the journey in detail. Each level jump has a specific area in which you can gain EXP and level up faster. The levels in Final Fantasy XI start from 1 and go through 99. Level One to Level Ten Gustaberg and Sarutabaruta Ronfaure This is the first step to FFXI and the main zones for this level are Sarutabaruta, Ronfaure, and Gustaberg All of the mentioned places are not that far off and you can find them around the main city, just outside. Time to put the boosts for EXP that we mentioned and move to the places. Your aim here is to pick a fight with an enemy who is around level one to level three, which is higher than your level. For this scenario, your best bet is Fields of Valor. Being the starting level, this part is somewhat straight, and in under a few minutes to 10 minutes, you will reach level 10. Furthermore, you can expand from these spots to other locations on the outer side to earn EXP on the next levels. Level Eleven to Twenty Gushen Mines If you don’t like Magic or Blunt damage, you can find this place to be really tough. Your job here is to focus mainly on the Skeletons while using that Page 1 Grounds of Valor. The only thing you need to be careful about is your health. In case the health bar falls too much and reaches the yellow spot, the blood aggro will build up. The aggro will cause sudden death because the skeletons will start jumping on you. Note: It is important to note that you might get scared or hyped from that Loud Siren. Certain cases cause it to ring, but you don’t have to worry about what happens after the siren. It is just that, it spooks players. Valkurm Dunes Here, you will need to kill those nasty lizards with Field of Valor Page 1. Be careful, sand hare is appearing after some time. If you are new to this location, it is essential to watch out for Goblins because they do deadly damage. This is just the Starting of Dunes, as you proceed further into the area, you will find more enemies that give you better EXP. If you find yourself to be strong in this area, you can begin this level from Page 3, allowing for an opportunity for Crabs and Damselflies. Level Thirty to Forty-Five Qufim Island From the Training Page three, four, and five, you can go for the Clippers, Gigas, Acrophies, and Greater Pugil. For the Level 30 players, things might be really difficult, but once you are achieving level 33, you will start to enjoy this stage. You just need to watch out for one thing, which is the Cermet Walls and the weapons near them. These are the magic aggro ones and you need to be aware of them. East Ronfaure This zone is also referred to as the Wings of Goddess, but to fight in this area, you need that good old Sigil. Further, you will find Ladybugs and Colibris here to fight. This is no specific fighting style or manual here for you to read. One thing to keep in mind is not using Food as the enemies can steal that buff from you, resulting in more difficulty. It is relatively simple and good for these levels, as nothing is complex for this spot. Did this guide help you in any way possible? Have the honors of checking out other FFXI Guides on MMOPIXEL and buy FFXI Gil from here at the cheapest rates possible Level Forty-Five to Fifty-Five Escha ZiTah If you completed the Lion’s Roar and went deep into the Rhapsodies of VanaDiel, then you have an opening to get boosted EXP for leveling here. The enemies you need to be looking for are Eschen Crawlers and Worms. There is no complexity here as well, everything is simple and easy to locate. Start with the worms and you can make that way to the crawlers. One tip is to have Dispel and Silence with you as the enemies can make use of strong spells and cause you trouble. Bostaunieux Oubliette Not a pleasant place to be as it is a sewer-based spot. Simply get that Page 2 Training and fight with Werebats or Funnel bats. Noting too shabby here, just look after those dangerous Hounds because of Blood Aggro. Our recommendation for passing this spot for Leveling up is Sneak. Level Fifty-Five to Sixty-Five Kuftal Tunnel Get your hands on that Page 1 Training and fight with Sand Lizards or Crabs (Robber). Simply watch your back as the hunts cause HP/Sound Aggro, resulting in a bit of trouble. With them being killed, you can get levels quickly in Final Fantasy XI. Wajoam Woodlands This is a wonderful place to be, as you don’t have to move anywhere else. Simply stay here and fight to get around ten levels quickly. Here, you will be needing the Sanction, which you can get from that Whitegate yourself. Outside the walls of the city, you need to focus mostly on the Lesser Colibri and don’t use food in any case. As we already mentioned, they will steal the buff from you. With sound and Health at night time, the Fomors (Undead) can also come and become a hurdle in the way. Levels Seventy to Eighty Zeruhn Mines One of the most popular spots for players of Final Fantasy XI, you can make use of that Page 5, 3, and 5 for the Convenience. In the mines, you will need to go a bit deep into higher levels and focus on anything you see as an enemy. Killing enemies like Burrower Worms and bats will get you a lot of EXP for leveling. Escha ZiTah Furthermore, you can also go into this area and kill Wasps, Eschen Goobbue, and Snapweed to get some EXP. This area is filled with these monsters to kill and gain some levels easily. Wasps are dangerous as they make use of that Final Sting when you are in a lower health portion. Levels Eighty to Ninety Dangruf Wadi For XP farmers this area is a real gold mine and it is also very versatile. Get yourself some EXP Rings for this area, as they will come in handy and allow for a quick level up. Primarily, your job here is to get Page 5 Training. This will allow you to reach I-8 after a geyser launches you upwards. Simply kill the Witchetty Grubs along with those Headsmen (Goblins) to reach level 85. Now turn to the Page 8 Training and move a bit deep to Natty Gibbons and Trimmers. Fight them to get around level 90. If you have those Rings, you can go well around level 92 or 93 with these spots. Level Ninety to Ninety-Nine Lastly, in this FFXI Leveling Guide 2022 we have reached the end. For these levels, we have various spots for various players. You can simply pick the one you like for leveling up from 90 to 99. Ceizak Battlegrounds Get yourself that Ionis Buff and go into this crowded place. The reason for the crowd is the Adoulin area which is a bit into depth here. Clean the area from Blanched Mandrogora and go around the coastline. Everything is straightforward, just keep the Sleep Effect AOE into consideration as well. Gustav Tunnel After reaching the Gustav Tunnel, you can turn to the Page 8 Training and go deep into the cave. Fill your pockets with Invisible or even Sneak for this area, as it will save you some time on Skeletons or Goblins. Reaching the I-7, you can fight with the Pygmytoise and Eaters Boulder to Level up fast and reach the end soon. Again, a fairly simple and easy way for players to Level up. Rala Waterways For the expansion of Seekers of Adoulin, this is a fairly good spot for leveling, but bring some of that Ionis before jumping into depths. In the Rala Waterways, you can fight with the Barnacle Crabs and the Depth walker Crabs. They are not that difficult for gaining easy EXP, but the real issue is Slimes. If you are not using Magic, then they are the tricked fellows to beat in the game. Yahse Hunting Grounds If you don’t like the Ceizak Battlegrounds, then this place is definitely for you to level up. Same as always, bring that Ionis with you to this spot. Here your target is mainly the Calfcleaving Chapuli and farming them will give you a handsome amount of XP. They are heavy hitters, but you can defeat them without any issue. Final VerdictAs of now, leveling in Final Fantasy XI is easy. You just need to slowly climb up the ladder and make use of specific farming locations. For farming, you do require some accessories at each level, but to wind things up, the enemies aren’t that difficult to defeat. For this reason, we have here FFXI Leveling Guide 2022 to help you with farming spots and guide you in gaming easy XP by defeating enemies. Source: https://www.mmopixel.com/news/ffxi-leveling-guide-2022.html  The most crucial choice you'll make when starting FFXIV is choosing what class to play. The beginning of your tale and the nature of your multiplayer adventures are influenced by the role you take on. An MMORPG's class structure frequently serves as the cornerstone for its success. Traditional systems' three primary class types are tanks, healers, and damage dealers. Players select a class to play as and are locked into that option until they create an alt. The less popular but more "traditional" approach does away with classes entirely and allows players to become whatever they wish. It was used in some of the genre's first games before being abandoned and later revived. Final Fantasy XIV's creators, Square Enix, have struck an intriguing compromise by including renowned classes and jobs from the Final Fantasy series and allowing users to play as any of them on any character. If a character fits the requirements, completes the accompanying Quests, and activates the right Soul Crystal, they can play as any of the current 10 Base Classes and extend them to all 18 Jobs. This guide tries to introduce you to all 18 of the jobs in Final Fantasy XIV and quickly outline each one's key characteristics. To produce a clear comparison tool for both new and seasoned players, it will highlight the tastes, strong points, and key gameplay elements of each of them while also attempting to bring out the faults. It will also concentrate on the modifications made in the Shadowbringers expansion. We'll go through the information you need to know before selecting a class in our FFXIV tutorial. We'll go through how roles function, how classes change into jobs, and how you may get additional jobs in the game's expansions, such as Endwalker. All these classes have their unique abilities and perks. You can buy weapons and upgrades for all the classes using Gils, and in case you are running dry, there is always the option to purchase them. If you need them, you can visit our website MMOPixel to buy FFXIV Gil. We will provide you with the best service and lowest price on the web. The Class types in Final Fantasy XIVTanksIn a sense, tanks act as shields for the other party members. They have strong defence and HP, as well as talents that draw the attention of their foes. 1. PaladinWith shields and holy magic, the paladin shields the group. Additionally, they use their MP supply to heal allies and inflict burst damage. Although the Paladin role is a great way to learn to tank, it may be difficult to master. 2. WarriorWarriors can effectively draw in swarms of enemies, do respectable damage, and have a range of self-healing abilities. The Warrior job is a wonderful option for those who have tried a DPS FFXIV character and want to try tanking. 3. Dark KnightThe strongest damage-mitigation ability in the game is possessed by The Dark Knight, who wields the power of darkness. Being a competent Dark Knight requires strong mana and blood management, which may be challenging in the heat of combat. 4. GunbreakersPlayers who like Squall from Final Fantasy 8 will most likely enjoy Gunbreakers. The playstyle of the Gunbreaker profession is easy, and it has various strong combinations that may boost damage or build shields. HealersDepending on how successfully they perform their job, healers either keep the squad alive or bring them back to life. While healing is taking place, healers can also inflict small injuries. 1. ScholarsThe Scholar calls forth fairies to aid the party's healing and serve as shields. Taking care of oneself and a fairy might make mastering the Scholar profession more challenging, but when handled properly, they can heal while doing good damage and are vital team players. 2. White MageTypically, when you think of a healer in Final Fantasy, you picture a White Mage. They have excellent spells for long-term recovery and considerable healing power. In addition, the White Mage job may assist with DPS if necessary and is quite simple to master. 3. AstrologianThe Astrologer employs cards to enhance teammates and magic to heal and protect the group. The two positions available to this FFXIV class are one for group shielding and the other for quick healing. 4. SageThe Sage is a healer class that employs aether-infused Nouliths that may be detached to help comrades out in combat by healing, boosting, or shielding the group with barriers. Melee DPSMelee DPS jobs put you face-to-face with your adversaries. While the tank keeps the enemy off-balance and the healer keeps you alive, deal a tonne of damage. 1. MonkMonks have the potential to hurt the group while also enhancing it greatly. An effective monk requires perfecting their move rotation, but with enough practice, they might also have one of the squad's highest DPS. It's crucial to remember that the Monk's functionality will be revived by Patch 5.4, which will debut in early December. 2. DragoonThe amazing leap attacks that dragoons are known for, as well as their overall bright personalities. They are often slower than other DPS vocations but do damage comparable to most DPS classes. Although dragoon might be challenging to learn, you'll look fantastic charging into combat. 3. NinjasNinjas use ninjutsu to carry out swift and effective variations. They may also use several debuffs on adversaries, increasing the squad's damage output. Nevertheless, because of their dependency on debuffs, ninjas have lesser DPS than other professions when used poorly. In addition, due to the speed of certain of the Ninja's skills, playing with high latency may be a little more challenging for them than for other classes. 4. SamuraiThe Samurai deals the most damage per second in the game, but he has no helpful quirks that aid the team in battle. Furthermore, without a group to support them, it is hard to keep a Samurai alive; therefore, single questing might be challenging. 5. ReaperThe two-handed scythe, which may be used to kill targets up close, is the main weapon of the Reaper and was initially introduced as the main weapon for the Dark Knight job in Final Fantasy XI. Ranged Magical DPSTake a step aside from the combat and employ various forms of magic to deal your enemy extremely heavy harm. Because you cannot move while casting, ranged magical DPS often has a limited range of motion. 1. Black MageSimilar to how the White Mage is a staple of the Final Fantasy series as a healer, the Black Mages are renowned for being powerful elemental casters. Final Fantasy XIV's Black Mages have a great damage potential, are not overly challenging to learn the principles of, but are challenging to master. 2. SummonerThree battle-pets, including some adorable Carbuncle you might recognize from earlier Final Fantasy games, are summonable by the summoner to help them in battle. Battle-pets assist teammates in being buffed, and summoners are capable of doing significant damage to single targets. If necessary, the summoner may raise fallen companions from the dead during combat. 3. Red MageThe Red Mage is one of FFXIV's most evenly matched professions, proficiently with black and white spells and weaponry. Due to their lengthy casting times, they produce less damage than other DPS classes, but their variety makes up for their slower pace. 4. Blue MageThe Blue Mage can only level up to level 60 and is only intended for solo play; with Patch 5.4, this cap will be lifted to level 70. Blue Mages may cast various spells and replicate the skills of vanquished foes. To help you determine if this single-player-only character is right for you, we offer comprehensive guidelines on unlocking the Blue Mage and what spells they can employ. Ranged Physical DPSLike ranged magical DPS, ranged physical DPS tasks pull you away from the action. However, because sluggish casting doesn't constrain them, they are far more mobile. 1. BardWith music, the bard primarily employs damage buffs to assist the party and removes enemy player debuffs. Despite the bard's poor damage output, the party's increased strength makes the bard useful in challenging circumstances. 2. MachinistThe Machinist utilizes turrets and a cannon to destroy adversaries. To effectively do huge damage when playing the Machinist, the Heat and Battery gauges must be filled. 3. DancerThe Dancer is a supportive and DPS position that is well-balanced. We have a comprehensive FFXIV Dancer career guide to provide you with additional information if the idea of dancing about the battlefield and cheering on your comrades appeals to you. All these classes have their unique abilities and perks. Source: https://www.mmopixel.com/news/final-fantasy-xiv-how-to-choose-a-job-guid.html There aren’t many MMORPG games that allow you to explore the oceans and enjoy sailing as well. But, in Mortal Online 2, you can pretty much do everything now because of the fishing updates. It wasn’t possible before in the Alpha or updates before that, but you can enjoy and explore the ocean in Mortal Online 2. Being something new to the game, it isn’t versatile, nor is it perfect, rather it is mostly just a mechanism that will slowly explore and take the attention of other gamers. For that reason, here we have Mortal Online 2 Sailing Guide. So, without any further delay, let us hop into the details. Water Adventure in Mortal Online 2 Well, for the most part, you are doing fishing in the water or traveling around with your boat buddies, battling and swimming. After the update every water body like seas and lakes supports fishing. There is a bit of difference with fishing for each water body, but altogether you can enjoy the water more than before. Fishing Get yourself a fishing rod and a bait, then go to the water body you want to fish in. Using the Rod to catch fish while attracting them with bait is surely boring but you can gain some Gils for that. This mechanism is surely old and we are not here to discuss it in detail. Action So, here is the interesting thing, you can go for the water combat while sailing and you can also do swimming. At the shore, there are boats that you can use to travel on the water. There is always fighting going on here and there, which results in proper water combat. To save yourself from physically meeting those people, you can use archery skills or bows to put some enemies to sleep. The stamina also works here because you can get tired from swimming, sailing, and also using archery skills. Always make sure to take some rest, recover your stamina and get back into action. Swimming for the most part is associated with resistance, dexterity, and speed. Fascinatingly, weight is also a thing here as when you are sailing or swimming the weight defines your ability to stay up for a specific time in the water. If you are not careful with your weight, you can drown and will surely regret the decision of going into the water. So, go for the light armor with a few tools that you will need on the ocean. Swimming and Sailing in Mortal Online 2 These things are relatively new and the developers are motivated to bring the real world into the mix of a game, instead of making the other mechanisms perfect. For the most part, Swimming is not the main action, but rather a secondary one. Yes, it is a skill that can be learned and enhanced through the skills of survival. But, to dominate the art of swimming, you will have to perfect both Swimming and Survival by leveling them up as much as you can. Sailing is the art of using a boat to travel on the ocean. This isn’t a major, nor a balanced thing in Mortal Online 2, but you can pretty much do everything that you can do in real life. Ranging from those ship battles on the water body to enjoying the beauty of Mortal Online 2, you should try it. Under the art of Swimming and Sailing, you will further find three more skills that we will discuss below; Don’t want to get in the hurdle of earning gold in Mortal Online 2? Check out our service on Mortal Online 2 Gold at the cheapest rates and safest platform Resistance Swimming The water body is not usually the same every time, there might be high currents and low currents depending on the weather. The same is the case with Mortal Online 2, and the ability to dominate strong currents is usually dependent on Resistance Swimming. Crawling If you wanted to become a swimmer in real life and you somehow didn’t, you can become a fast swimmer by selecting the Khurite tribe or that good old Alverin character. Crawling is related to the techniques of fast swimming and investing in it means you will be quicker. Diving Going inside the water, controlling for breathing, and having a bit of resistance to underwater currents is referred to as the Diving. Not Learning to Swim If you don’t learn the skill to swim, you won’t be able to enjoy the beauty of Mortal Online 2. You will sink in the ocean, deprive yourself of a mechanism that will surely be a major one in the upcoming days, and finally, you won’t enjoy ship battles. In case you want to learn about swimming, you can find a book on diving and a book on swimming in the area of Khurite. Should you spend skill points on Swimming? As we already mentioned Swimming and Sailing, or even using the water body is relatively new and will probably get better with updates. Things aren’t looking good with spending the Skill Points in this section as the future is unknown. If you have 100 Skill Points available and your character isn’t that strong, you can put it somewhere else instead of Swimming or Sailing. On the other hand, if you don’t care about Skill Points and want to explore the Mortal Online 2 mechanisms, surely you need to experience both Swimming and Sailing. Final Verdict Swimming and Sailing do open the path to exploring the ocean and seas of mortal online 2, but they aren’t balanced yet. In a few months, the developers will put more stuff here and there while balancing a few things that will further make this mechanism great. Just like the other mechanisms of the game where you spend Skill Points to learn and then level up a trait, the same is the thing with Swimming. For the players, we made this Mortal Online 2 Sailing guide to help figure out this new system. Source: https://www.mmopixel.com/news/mortal-online-2-sailing.html The pirate coins are one of many Lost Ark currencies players can do many things with, such as recruit ship crew, recruit stronghold crew, purchase upgrade materials for your ship, and get a variety of collectibles.
What’s more, the currency allows you to buy the most wanted Song of Resonance from the treasure hunter Igran, so it's important to get as many pirate coins as possible. Let’s find out how to do that! How to Earn Pirate Coins for Lost Ark This Lost Ark guide will help you with ways to farm this coin the best way possible. There are many different ways to get pirate coins in Lost Ark. Make Good Use of Adventure Islands and Island Quests Traveling through different islands and completing the available quests is a great way to gather some more pirate coins. When you clean an island, you will have the advantage of collecting more than just pirate coins. Here follows a list of islands alongside the number of Lost Ark pirate coins you can get there.
These specific types of islands also reward pirate coins, but they are available only one time per day during the week and twice on the weekends. They are also a great tool to farm pirate coins in Lost Ark. For more Lost Ark tips, make sure to check out MMOPixel, a trustworthy MMORPG gold shop. If you need to buy Lost Ark Gold at cheap prices then visit us. Coin Exchange Lost Ark has many different currencies, some easier to find than others. So, to ensure a better balance in terms of coin possession, players can trade a currency for a different one. For example, you can exchange sea coins, ancient coins, or sun coins and earn pirate coins in Lost Ark. Of course, all the coins in Lost Ark have their exchange rates. This means that one pirate coin is not equal to one coin in other currencies. Here’s a list of currencies exchange rates.
Una’s Tasks This is another excellent way to keep a constant income of extra pirate coins in Lost Ark. After reaching level 50, you unlock some daily and weekly quests. Completing quests such as these will not only reward you with pirate coins but also reputation points, for instance. Some missions will give you many pirate coins and help you reach great cash soon. When completing Una’s tasks, focus on these missions:
These coin chests are special and epic chests from which you can pick an amount of 100 coins of one of the possible currencies. The available currencies are all those listed previously. Since you have trading rates for them, it is obvious that, once again, you can use any other currency to trade for bonus pirate coins in Lost Ark. Outside almost every city, you will find traveling merchant ships that can make the trade for you. Stronghold Expeditions: Your stronghold crew is a good way to find pirate coins. Every time you set them to go for an expedition, they will take some real-world hours but will come back with expedition experience and some pirate coins for you. It may not be much, but you will get pirate coins doing that. Just mind sending them when you are about to stop playing the game. That’s because they will need the same number of hours. If you are about to stop playing, you can just come back later and get the reward of a complete expedition done while you were out. Use the Game Events in your Favor Besides the daily and weekly quests, you will also have several marine events happening everywhere. They are a great opportunity to get pirate coins and other sea coins. That way, remember to check your calendar and your compass, so you can be a part of the next naval event. Even though they are sporadic, they can make a difference. Conclusion Now, you know all the tricks and best ways to get Pirate Coins in Lost Ark. The good use of currency is one of many factors that improve your development and gameplay in Lost Ark, and now you know what’s needed to start filling your pockets with it. Source: https://www.mmopixel.com/news/lost-ark-pirate-coins-see-how-to-gather-as-much-as-you-can.html  One of the most played games on Steam is New World, which is debatably the best MMORPG. It has seven trading crafting skills. They have the highest-quality furniture. The study of the planet and the level of the second level also make the profession highly intriguing for new players when level 200 reaches a turning point. Additionally, there are positive aspects of life as well as long-lasting benefits. You can add your personality to your house. We hope it will be worth your time and work, so kindly trust us. Our new global furnishing leveling guide includes quick advice on how to earn the most money. Fundamentals you should knowLet's go through the fundamentals before we move on to the trickiest section. You can finish furnishing there if the workshop has the right tier level for the object you want to furnish. By accepting and finishing town projects, you can raise the workshop tier. Then, if it sounds like enough labor, you may transfer to another town using the necessary workshop tier, level up your furnishing there, and then return to your current town once you've finished. You probably already know the following point if you've played many MMORPGs. First, make certain to create some things. The third rule is to think carefully about the furnishings you choose to create a comfortable living space. Two things must be kept in mind while accomplishing this. The first is that they use abundantly available raw materials, and the latter is that they provide a respectable level of XP when they are made.  Weaponsmithing An excellent approach to ensure you have the greatest equipment to deal with the dangers Aeternum has to present is to learn weaponsmithing. You will certainly come across many resources that could be used to make gear while adventuring. However, you are only able to create a certain amount of weapons. The forge can only be used to create melee weapons. Consequently, by using the right ingredients, you can create: Rapier Hatchet Great Axe War Hammer Spear Round Shield Longsword Linked Skills A few abilities can help you become a better weaponsmith. These skills can be used for various things, including resource gathering and actual crafting. Smelting Woodworking Leatherworking Mining Logging Skinning Benefits of Levelling in Weaponsmithing The more gear you produce, the more proficient your weaponsmithing becomes. As you advance through the stages, you'll also be able to build better gear. Every object you create can have extra features or advantages. The benefits and attribute points you receive will improve as your weaponsmithing skill improves. How to Enhance Your Weaponsmithing Techniques? Traditional approaches can be tedious and time-consuming when used to advance your talents progressively. Do you need to be exceptionally skilled, and do you want to make new, better weapons as fast as possible? If that's the case, power leveling will be required. This is done by repeatedly manufacturing a large quantity of the same kind of thing. Thanks to the crafting enhancement "Weaponsmith's Temperament," all of this aids us in completing Town Projects. It shouldn't be surprising that we would require significant funding and materials. However, if you are running short of Gold Coins, you can easily purchase them for a reasonable price. You can buy New World Gold at our website MMOPixel at an unbeatable price. Level 0 - Level 20 Craft Iron Rapier and Iron Longsword x25 Iron Rapier and Iron Longsword require these items: 700x Iron Ore 200x Green Wood 100x Rawhide Level 20 - Level 60 Craft Weak Honing Stone x429 Requirements: 1716x Stone 429x Death Mote 429x Fire Mote Level 60 to Level 75 Craft Iron Rapier and Iron Longsword x169 Iron Rapier and Iron Longsword require these items: 4732x Iron Ore 1352x Green Wood 676x Rawhide Craft Weak Honing Stone x563 Requirements: 2252x Stone 563x Death Mote 563x Fire Mote Level 75 - Level 80 Craft Weak Honing Stone x275 This will require the following items: 1028x Stone 257x Death Mote 257x Fire Mote Craft Earth Battered and Earthen Smasher Axe x17 Earth Battered and Earthen Smasher require the following items: 1360x Iron Ore 1020x Rawhide 340x Green Wood 272x Silver Ore 68x Fae Iron Level 80 - Level 105 Make Earthen Smasher and Earth Battered Axe x120 Earth Battered and Earthen Smasher require these items: 9600x Iron Ore 7200x Rawhide 2400x Green Wood 1920x Silver Ore 480x Fae Iron Level 105 - Level 110 Make Starmetal War Hammer and Starmetal Great Axe x17 Starmetal Great Axe and Starmetal War Hammer require these items: 1428x Starmetal Ore 5712x Iron Ore 2856x Aged Wood 714x Sand Flux 204x Green Wood 136x Rawhide Level 110 - Level 125 Make Starmetal War Hammer and Starmetal Great Axe x 71 Starmetal Great Axe and Starmetal War Hammer require these items: 5964x Starmetal Ore 23856x Iron Ore 11928x Aged Wood 2982x Sand Flux 852x Green Wood 568x Rawhide Craft Steel Great Axe and Steel War Hammer x 186 Steel Great Axe and Steel War Hammer require these items: 29016 x Iron Ore 9672 x Aged Wood 2418 x Sand Flux 2232 x Green Wood 1488 x Rawhide Level 125 to Level 160 Make Starmetal War Hammer and Starmetal Great Axe x 242 Starmetal Great Axe and Starmetal War Hammer require the following items: 20328x Starmetal Ore (84 for each) 81312x Iron Ore (336 for each) 40656x Aged Wood (168 for each) 10164x Sand Flux (42 for each) 2904x Green Wood (12 for each) 1936x Rawhide (8 for each) Craft Starmetal Longsword and Starmetal Rapier x383 Starmetal Longsword and Starmetal Rapier require the items listed below: 20682x Starmetal Ore 82728x Iron Ore 41364x Aged Wood 10341x Sand Flux 3064x Green Wood 1532x Rawhide Level 175 - Level 200 Make Orichalcum War Hammer and Orichalcum Great Axe x285 Orichalcum Great Axe and Orichalcum War Hammer require the items listed below: 34200x Orichalcum Ore 51300x Starmetal Ore 205200x Iron Ore 119700x Aged Wood 29925x Sand Flux 3420x Green Wood 2280x Rawhide How to Improve Your Weaponsmithing? The two basic ways to improve your weaponsmithing are buffs and perks. Both can be stacked, but as with everything wonderful, there are restrictions. The number of available perk types is based on the item type. Each item can only have one type of perk. For instance, since Weaponsmithing Expertise is an Armor Perk, an amulet cannot possess it. There are always exceptions to the norm; occasionally, a quest item will grant a named item with a double perk, but we are not aware of any for weaponsmithing. A Weaponsmithing armor set is available for gamers who desire to boost their crafts' gear score values. The only distinctions between the sets are their aesthetics. To get the perks you want, you can also combine and match them as necessary. Furthermore, you can buy the armor from other players because it is also tradeable. Conclusion Congratulations to a dedicated guy. Your work and efforts will now be repaid because this is the only beauty of the new world. You can now create any furniture you want to utilize to furnish your home. Now is the time to make the best decisions possible: locate the blueprints for the furniture you want most and furnish it. With all said, we hope that our guide on levelling up your furniture in the New World server was helpful. Source: https://www.mmopixel.com/news/new-world-weaponsmithing-levelling-guide.html 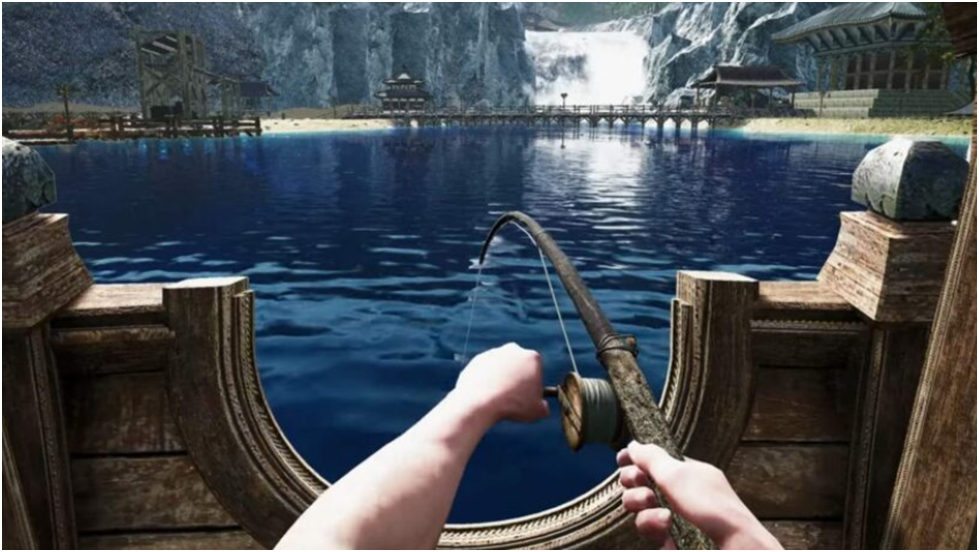 There aren’t many MMORPG games that allow you to explore the oceans and enjoy sailing as well. But, in Mortal Online 2, you can pretty much do everything now because of the fishing updates. It wasn’t possible before in the Alpha or updates before that, but you can enjoy and explore the ocean in Mortal Online 2. Being something new to the game, it isn’t versatile, nor is it perfect, rather it is mostly just a mechanism that will slowly explore and take the attention of other gamers. For that reason, here we have Mortal Online 2 Sailing Guide. So, without any further delay, let us hop into the details.
Water Adventure in Mortal Online 2 Well, for the most part, you are doing fishing in the water or traveling around with your boat buddies, battling and swimming. After the update every water body like seas and lakes supports fishing. There is a bit of difference with fishing for each water body, but altogether you can enjoy the water more than before. Fishing: Get yourself a fishing rod and a bait, then go to the water body you want to fish in. Using the Rod to catch fish while attracting them with bait is surely boring but you can gain some Gils for that. This mechanism is surely old and we are not here to discuss it in detail. Action: So, here is the interesting thing, you can go for the water combat while sailing and you can also do swimming. At the shore, there are boats that you can use to travel on the water. There is always fighting going on here and there, which results in proper water combat. To save yourself from physically meeting those people, you can use archery skills or bows to put some enemies to sleep. The stamina also works here because you can get tired from swimming, sailing, and also using archery skills. Always make sure to take some rest, recover your stamina and get back into action. Swimming for the most part is associated with resistance, dexterity, and speed. Fascinatingly, weight is also a thing here as when you are sailing or swimming the weight defines your ability to stay up for a specific time in the water. If you are not careful with your weight, you can drown and will surely regret the decision of going into the water. So, go for the light armor with a few tools that you will need on the ocean. Swimming and Sailing in Mortal Online 2 These things are relatively new and the developers are motivated to bring the real world into the mix of a game, instead of making the other mechanisms perfect. For the most part, Swimming is not the main action, but rather a secondary one. Yes, it is a skill that can be learned and enhanced through the skills of survival. But, to dominate the art of swimming, you will have to perfect both Swimming and Survival by leveling them up as much as you can. Sailing is the art of using a boat to travel on the ocean. This isn’t a major, nor a balanced thing in Mortal Online 2, but you can pretty much do everything that you can do in real life. Ranging from those ship battles on the water body to enjoying the beauty of Mortal Online 2, you should try it. Under the art of Swimming and Sailing, you will further find three more skills that we will discuss below; Don’t want to get in the hurdle of earning gold in Mortal Online 2? Check out our service on Mortal Online 2 Gold at the cheapest rates and safest platform Resistance Swimming: The water body is not usually the same every time, there might be high currents and low currents depending on the weather. The same is the case with Mortal Online 2, and the ability to dominate strong currents is usually dependent on Resistance Swimming. Crawling: If you wanted to become a swimmer in real life and you somehow didn’t, you can become a fast swimmer by selecting the Khurite tribe or that good old Alverin character. Crawling is related to the techniques of fast swimming and investing in it means you will be quicker. Diving: Going inside the water, controlling for breathing, and having a bit of resistance to underwater currents is referred to as the Diving. Not Learning to Swim: If you don’t learn the skill to swim, you won’t be able to enjoy the beauty of Mortal Online 2. You will sink in the ocean, deprive yourself of a mechanism that will surely be a major one in the upcoming days, and finally, you won’t enjoy ship battles. In case you want to learn about swimming, you can find a book on diving and a book on swimming in the area of Khurite. Should you spend skill points on Swimming? As we already mentioned Swimming and Sailing, or even using the water body is relatively new and will probably get better with updates. Things aren’t looking good with spending the Skill Points in this section as the future is unknown. If you have 100 Skill Points available and your character isn’t that strong, you can put it somewhere else instead of Swimming or Sailing. On the other hand, if you don’t care about Skill Points and want to explore the Mortal Online 2 mechanisms, surely you need to experience both Swimming and Sailing. Final Verdict: Swimming and Sailing do open the path to exploring the ocean and seas of mortal online 2, but they aren’t balanced yet. In a few months, the developers will put more stuff here and there while balancing a few things that will further make this mechanism great. Just like the other mechanisms of the game where you spend Skill Points to learn and then level up a trait, the same is the thing with Swimming. For the players, we made this Mortal Online 2 Sailing guide to help figure out this new system. Source: https://www.mmopixel.com/news/mortal-online-2-sailing.html Today, we are talking about :How to slay your dragon.
Since the original release of The Elder Scrolls Online, players have been wondering when dragons would make an appearance. It seemed all but inevitable, pesky lore aside. This was the hallmark encounter of the previous installment in the series, The Elder Scrolls V: Skyrim. Since then, many players have been clamoring for a similar experience. Developer ZeniMax Online Studios deliver this and much more in a big way in the next big expansion, Elsweyr. Elsweyr offers open-world dragon carnage Much like previous overland events (such as Dark Anchors), the dragon threat occurs right out in the open, all across Elsweyr. This event, called Dragon Hunts, is available for any and all to join. Unlike previous events, however, dragons are quite far from static. There are multiple areas on the map where dragons can land to do battle with hopeful adventurers. Players can see dragons both on their map and soaring freely through the skies. For the adventurers brave enough to corner one, the battle is far from a cakewalk. As Elite encounters, dragons are highly formidable enemies. The team at ZeniMax made sure that they were extremely hard to kill. Long story short? Don’t try taking one on alone, unless you have a death wish. This is rather hopeful news for ESO. For all its accolades, many Skyrim fans felt as if the dragon encounters were too easy. There were even popular mods which intended to increase the difficulty and intelligence of the encounters to present a challenge to higher-level characters. This is a big step in the right direction for The Elder Scrolls, with Dragon Hunts essentially forcing players to work together. How to down one of Elsweyr’s dragons I cannot stress this enough: do not try and solo a dragon. Dragons in Elsweyr have more than 14 million health points. They have a myriad of very powerful attacks to boot, which makes soloing them nearly impossible. First and foremost, positioning is key. While many players’ instincts from Skyrim may encourage them to flank or attack the dragon from behind, it has abilities to counter both of these. If the dragon notices too many players behind it, it’ll swipe its tail to knock players back and cause a high amount of damage. Flanking the dragon has its own perils, as well. Players who invade a dragon’s personal bubble from the side get treated to Wing Buffer. This attack deals more damage the closer players are to the dragon. This also spawns three fire tornadoes afterward, the combination of which being enough to outright kill a player. The best way to down a dragon is positioning In addition to its formidable melee abilities, they wouldn’t be dragons without some nice fire breath, would they? One of the more frustrating attacks is the Fireball. For this attack, the dragon flies to a rock and begins lobbing fireballs at players. While this can be frustrating, players can stand close enough to the boulder the big lizard is perched on and break its line of sight, causing it to stop targeting the player. Dragons also use a cone-based attack called Shout Of Power. This is actually a heavy attack, so players can actually block in order to avoid the knock-back. You’ll still take some damage, but at least survive. The most intimidating attack these big guys have, however, is Scorch. This is where the dragon uses its breath to set the ground aflame, spawning enemies in the process. The key to evading Scorch is to wait until the dragon starts flying in the your direction, and strafe for dear life. Dragons are a handful, but with the right amount of coordination and practice, can take a dirt nap much like any other baddie. Face The Elder Scrolls Online‘s newest trial: Sunspire In an exciting new 12-player raid, players face down a powerful golden dragon named Nahviintaas. Located at The Temple of the First Cat, as the lore goes, Nahviintaas arrived at the Temple after the dragons overtook Elsweyr. Making claim to be the avatar of Akatosh, the temple denizens accepted his claim and allowed him to lord over them. That said, there are some who reject the dragon’s claims, and that’s where adventurers come into the picture. In this complex trial, Nahviintaas has two dragon generals by his side as well. Players must challenge his rule, first dealing with his generals and then him. In addition to fighting the dragons themselves, who each have their own raid mechanics, adventurers must deal with four distinct disciples, each with their own powers. This challenging dungeon experience also has its very own hard mode for each encounter. Elsweyr‘s trial has as much reward as it does risk While some of the challenges certainly seem daunting, the payout is definitely worth it. In addition to an all-new armor set called The False God’s Devotion, there are some pretty sweet titles for completing the trial. In order to gain the title of “Sunspire Conqueror,” players will have to complete the entire trial on veteran difficulty. Also, for beating all the dragons on hard mode, without a single death and in under 30 minutes (oof), players will earn the title of “Godslayer.” The new armor set grants Minor Slayer at all times, boosts spell critical, and damage by a considerable amount and greatly reduces Magicka cost for player abilities. An added bonus, as well, is gaining increased movement speed and Magicka whenever a player kills an enemy. Finally, if players completely every single trial achievement, they will earn a brand-new mount. While Elsweyr has already entered Early Access, the real fun begins on June 4, when the DLC officially drops for PC. if you want to buy ESO gold, you can choose MMOPIXEL,we have the most professional and outstanding customer services. fast delivery time and refund guarantee,please feel free to contact our 24/7 online live chat. Source: https://www.mmopixel.com/news/eso-elsweyr-guide-how-to-slay-your-dragon.html |
 RSS Feed
